
Introduction #
In many cases, a u3a will need to notify members of urgent changes to upcoming events, venues or locations. To achieve this, SiteWorks is provided with this capability—u3a Notices. This provides the site visitor with a short notice or directs them to information on another page.
It should be noted that Notices are time-limited. It is recommended that Notices be displayed on the Home (or, if required, any other significant) Page. To display the list of current notices, the page MUST include the u3a notice list widget.
This user guide discusses:
Displaying Notices #
To ensure that a notice is displayed, the display block, u3a notices list, should be placed in the required location, typically the Home page. The Notices block has some options discussed here. Users should refer to the widgets and shortcode user guide for an overview of a widget.
When inserted, the page in edit mode should look like this (in this example, the widget has been placed on the right-hand side of a Media and Text block) :
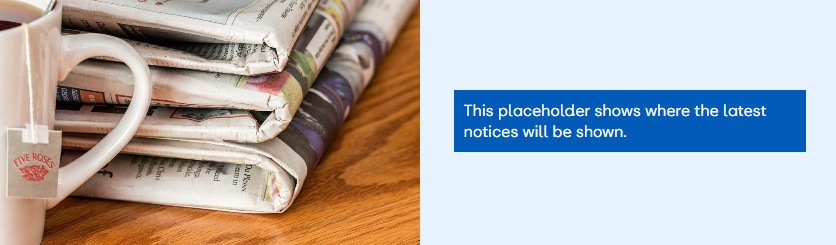
When displayed, visitors will see:
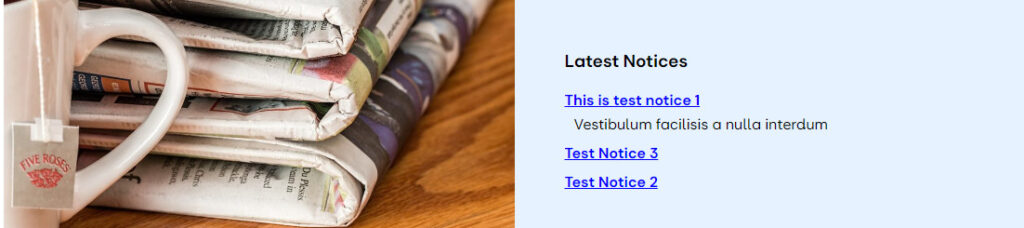
Note that the notice, This is Test Notice 1, has some associated text. This needs to be added separately as an excerpt.
The u3a notices list widget has several options that can be defined. In edit mode, the options will appear in the right-hand pane as shown below.
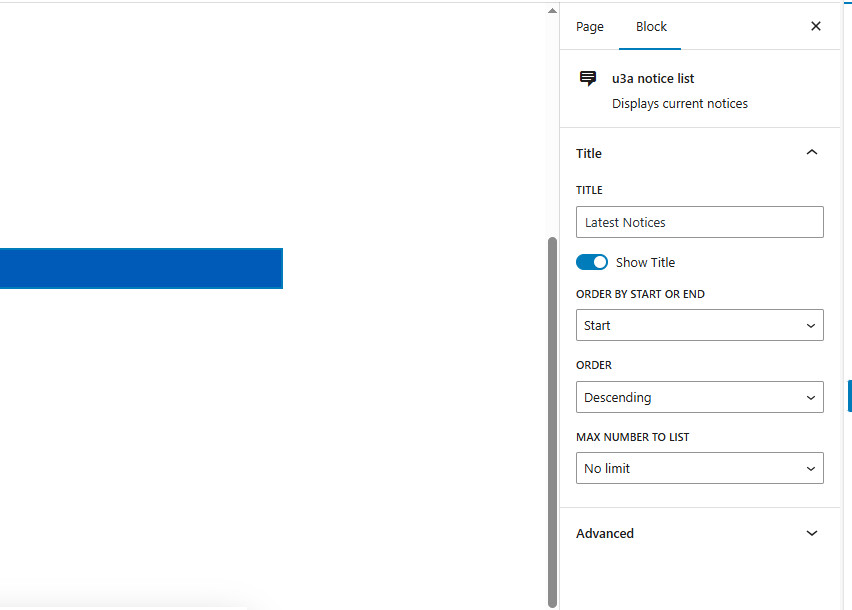
The options are:
- Title. The displayed title can be changed from the default “Latest Notices” to something more appropriate, if required. The title can also be deselected.
- Order. Notices can be sorted by their respective start or end dates, either in ascending or descending order.
- Number displayed. The number of displayed notices can be restricted if required.
Creating a Notice #
Preparing a new notice. #
The process to create a new Notice can be either:
- Selecting New ⇒ Notice from the administrative toolbar.
- Selecting u3a Notices ⇒ Add New Notice from the Dashboard.
In addition, the following details are required:
- The title of the Notice (mandatory).
- The dates between which the notice is displayed (mandatory).
A Notice consists of two components: (i) the display time period and an optional URL (the notice’s metadata, which is displayed through the use of Meta boxes) and (ii) the notice itself.
Entering the Notice’s Metadata. #
The Meta Boxes are located at the bottom of the screen below the notice; if they are not visible, select the caret at the bottom of the screen, as discussed here. The Meta boxes can now be filled as discussed below:
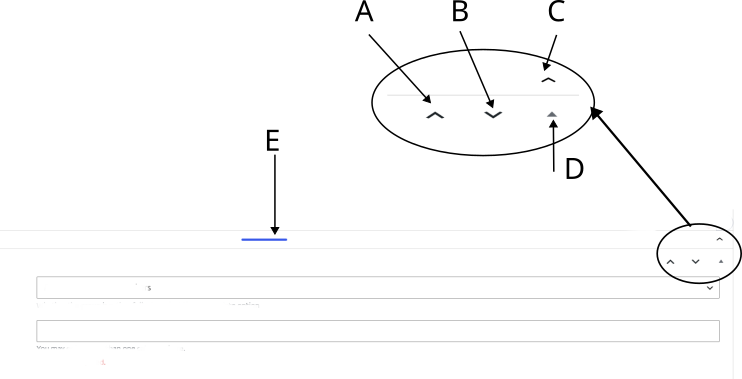
The view above allows the events information to be entered when the Meta boxes are at the bottom of the screen. Changing the view is achieved by using the chevrons and arrowheads at the bottom right as follows:
- A is inoperative in this view.
- B moves the Meta boxes to the sidebar.
- C hides the Meta boxes from view; the view can be recovered by selecting the inverted caret at the bottom of the screen to the right of “Meta boxes”.
- E is a drag bar that allows the content creator to view more meta boxes as required (note the bar is grey when not selected, and blue when selected.
When the Meta boxes are placed in the right-hand sidebar, the following view results:
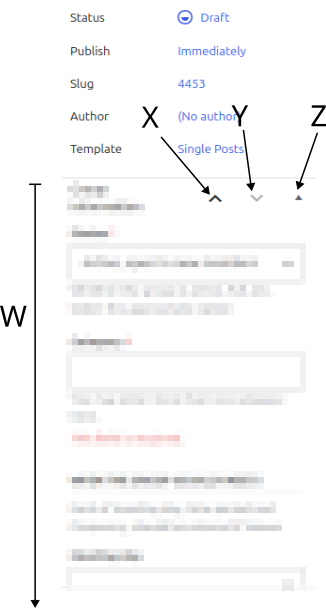
- W is the Event information; the content creator will need to scroll down to locate all the options.
- The two arrowheads and caret provide the following options:
- X returns the Meta boxes to the bottom of the main screen
- Y is inoperative in this view.
- Z hides/reveals the Meta boxes in the sidebar.
To complete the metadata, the following required fields are:
- In the Dates field, the start date is set by default to the current date, but can be changed as required; together with the end date, these are mandatory. If not supplied, an error message is displayed. In the current version, the date format is YYYY-MM-DD. It is recommended that the date be selected from the calendar, which opens when the date block is selected; however, if manually entered, a format check is undertaken.
- In the URL field, a URL can be provided to direct the user to another page on the website (for example, an event) or an external site, such as the National Office. Note that if a URL is entered, the notice text will not be displayed.
Entering the Notice #
The descriptive text is entered in the normal manner into the screen shown below:
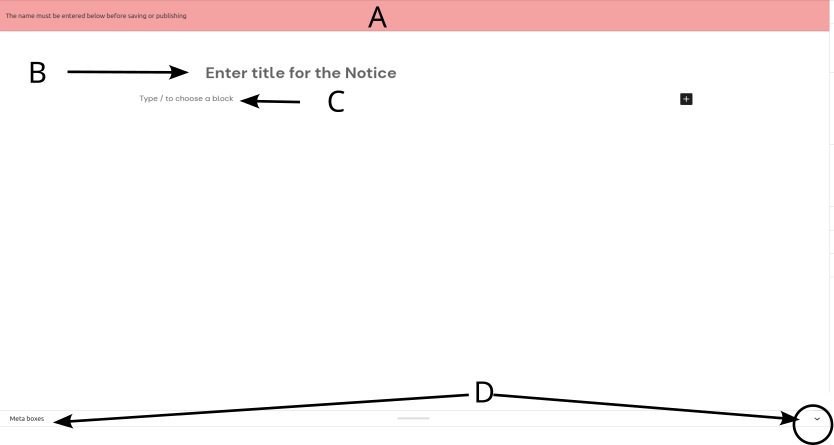
- The mandatory information must be entered to clear the error message.
- Title of the Notice
- Descriptive text and images can be entered at this location.
- If the Meta boxes are not visible, the data can be accessed by the inverted caret (∨) in the lower right-hand side of the screen, opposite the Meta boxes label. NOTE: If this is not visible, ensure that the screen is fully scrolled to the bottom of the view.
Once the event’s data has been edited and saved using Publish, it will be displayed.
Displaying a Notice Excerpt #
In some cases, the creator of the notice may wish to provide an excerpt, perhaps stressing the importance of the notice or ensuring that it is correctly targeted. To do this, an optional excerpt can be entered. To enter the excerpt, which can be different to the text in the notice, select Notice in the settings sidebar, scroll down to Excerpt and enter the required text. Links or the contact form shortcode MUST not be used in an Excerpt; see here, hence copying and pasting text should be avoided.
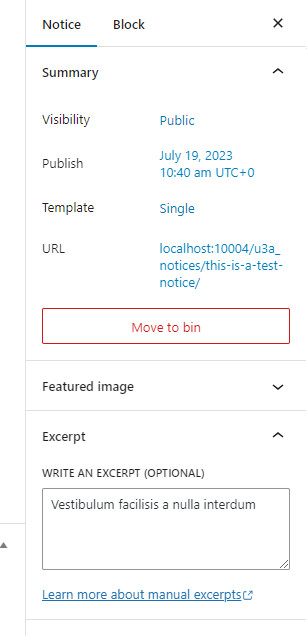
In the u3a notice list widget, WordPress will not automatically create a 55-word extract that appears when using Posts.
Displaying the Notice. #
Once editing is completed with no errors reported, it can be published, and the Notice will appear on the website for the prescribed duration.


