Introduction #
WordPress allows all users to upload media to enhance the visitor experience. This guide discusses media types and how they are uploaded and managed using the WordPress Media Library. Using an image or other media in a page or post is discussed separately.
It is recommended that the website administrators and content creators are familiar with editing digital images. A wide range of tools and packages are available, for example, Adobe Photoshop or GIMP.
Copyright #
When using third-party images or text (e.g. poetry) web managers and content creators must be aware of their responsibilities regarding copyright. United Kingdom law relating to image copyright is discussed in the Copyright notice: digital images, photographs and the internet – GOV.UK (www.gov.uk) webpage.
The main u3a site has general information with additional image copyright guidance information.
It should be noted that the copyright symbol, ©, is not required in UK law, and hence need not appear next to the image or text.
Copyright considerations will also apply to video, audio and other third-party documents. Some key points to remember:
- Authors and content creators should consider all material on the web to be copyrighted unless explicitly stated.
- WordPress provides access to the Openverse, which offers more images than a u3a could consume! The available images are for free use either with a Creative Commons Licence or are in the public domain. However, when using this or similar sources, an image caption MUST show the licence details.
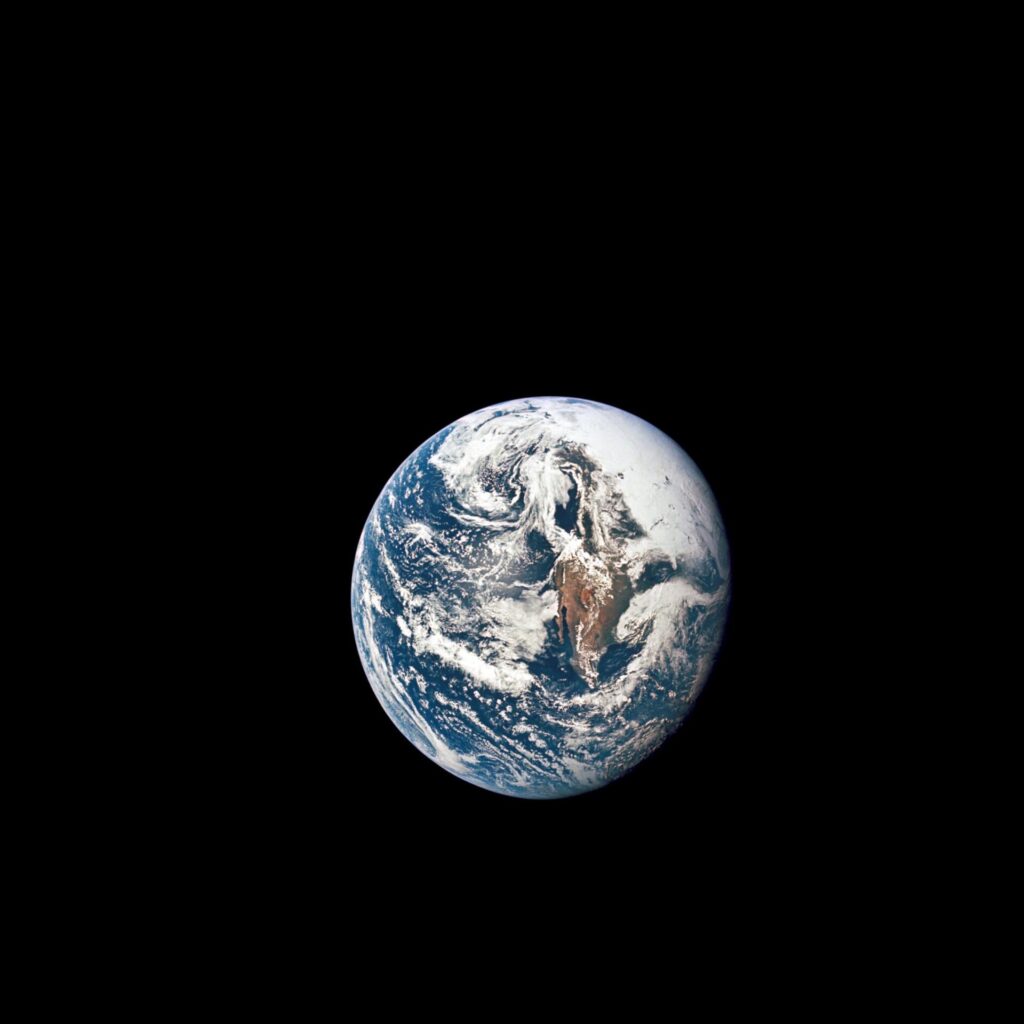
The fully caption together with the attribution is shown below:
“May 18, 1969 – Apollo 10 View of the Earth” by NASA’s Marshall Space Flight Center is licensed under CC BY-NC 2.0.
This particular licence requires the user to:
- Fully credit the creator.
- Use the images for noncommercial uses only.
- When a u3a member provides an image, text (e.g. a piece of creative writing) or audio file for use on their u3a website, it should be noted that the member retains the copyright, unless they have explicitly transferred it to the u3a. In most cases, they have permitted the u3a to use the material. With any form of media, it is recommended that the provider’s name be added to the file’s metadata via the description box.
- If a member of a u3a appears in an image, explicit permission, as defined in an individual u3a’s Privacy Policy, must be followed.
It should be noted that copyright is bidirectional, see How copyright protects your work, therefore the copyright of individual pages of the website produced by the u3a is protected. Hence, when a photographer has supplied an image, they cannot use a copy of the page in which the image appears, for their publicity or in other material without the permission of the individual u3a.
Media Types #
WordPress can handle a wide range of media files, including:
- Images (jpg, jpeg, png, gif, ico)
- Audio (mp3, wav)
- Video (mp4, wmv)
- Documents (pdf, docx, xls)

The file types explicitly excluded from uploading by SiteWorks are: .7z .gz .gzip .rar .tar .zip, while .bz2 .cab .tgz .zipx .zst files are not accepted by WordPress.
Image files #
Image files can be uploaded to SiteWorks either in .jpg (Joint Photographic Experts Group) or .png (Portable Network Graphics) files. However, the following points should be noted:
- JPEG files are designed to efficiently store high-quality digital photographs, by compressing large images into much smaller file sizes, making them easier to share and upload.
- PNG files benefit from lossless compression. This means no data is lost when the image is compressed — the quality stays the same no matter how many times you edit and save the file. The image won’t become blurry or distorted, making PNGs ideal for sharp logos and graphics.
For this reason, photographs should always be uploaded as jpg or jpeg files, to minimise storage requirements.
It is recommended that the use of .png files be restricted to graphics or logos where transparency is required.
To convert image files to jpg either use a photo-editing package or an online converter. Also the SiteWorks supplied Imsanity plugin can convert PNGs and Apple HEIC format images to JPEGs. Navigate to Setting > Imsanity and check the ‘Convert’ tickboxes.
Video files #
Uploading video files to SiteWorks is not permitted under the Terms and Conditions due to limitations of the available storage for individual u3s’s. If a video is required a link to the video file (typically uploaded to YouTube) is required to be placed on the webpage.
Documents #
It is recommended that all documents are converted to PDF prior to uploading. This is preferred over other document formats (e.g. odt or docx) as they can be locked to prevent editing or printing from a download.
If a u3a requires a document (e.g. membership form) that needs to be completed by a member, these can be developed using LibreOffice.
Media Generated by Artificial Intelligence #
With the increasing availability of Generative AI tools, many u3a may wish to use the approach to add media (typically logos, images or text) to their sites. In doing so the following points should be noted:
- Artificial Intelligence based tools should be seen as a starting point for, or a tool used in, generating material.
- u3a’s should not publish written material fully generated by AI, as any generative AI tool is susceptible to bias (in particular gender, people of colour and disabilities), errors and mistakes. In addition, the generated text will probably not have the correct tone or voice for a u3a.
- AI-generated images should only be used if an existing image cannot be used.
- When generative AI media is used:
- Copyright and GDPR must be fully considered.
- Full transparency must be applied and the addition of the following to the caption and Alt Text should be considered – This content was generated with the help of [insert tool here], and its use has been carefully reviewed by the website administrator and/or the committee.
Image Specific Considerations #
Understanding Image Sizes #
When importing and using images the content creator must be aware of their size and how they are displayed on a monitor, tablet or smartphone.
- A digital phone can take 12Mpx (megapixels) images, which equates to a 6000×2000 pixel image for a 3:2 aspect ratio.
- A modern digital camera image can exceed 24Mpx, which equates to a 6000×4000 pixel image, which requires 69MB of storage, depending on the file format
- A typical desktop monitor display resolution is 1920×1080 pixels.
- A tablet’s screen resolution depends on the manufacturer but is typically between 1280×800 and 786×1024.
- A mobile phone has a screen resolution of 480×800 to 1440×2560 depending on the model. The most common resolution is 720×1280.
The memory requirements for an image are dependent on both the size of the image and its format. A modern digital camera can produce an image over 60MB in the RAW format, this is far more than what is required for a webpage. For this reason, before uploading an image, it is highly recommended that the content provider adjusts the resolution of an image and converts the image to a compressed file format (e.g. jpg, jpeg, png). When edited and in the correct format, an image should not exceed 100KB to 150KB in size.
When uploading an image, using the Media Library, with a height or width greater than 1920px, the Imsanity plugin will adjust its resolution, i.e. the number of pixels in the image. Imsanity reduced the resolution by compression, not cropping the image. The aspect ratio of the image is not changed. The Imsanity settings are available from the Dashboard using Settings ⇒ Imsanity. If images are uploaded via FTP or similar, the image files will bypass Imsanity and hence need to be resized as discussed here.
If you upload an image significantly smaller than 1000×1000 pixels, the displayed image will not be sharp when viewed on a desktop or laptop. To ensure the image is sharp, the display area must be reduced, during content creation. It should be noted that mobile devices (tablet or phone) have different screen sizes, hence the importance of checking image quality before publication, to confirm a page’s readability on all devices, as discussed here. This should be undertaken before publishing a new or updated page
It is also important to note that on a standard desktop monitor, the maximum width of a displayed image on a SiteWorks page, with the browser magnification set to 100% is 840px.
Use of Alternative Text #
It is important to recognise the importance of Alternative text or Alt Text, this is a feature to help visually impaired users understand images and is used to convey the “why” of the image as it relates to the content webpage. When the page is displayed using software tools for the visually impaired, this description is read aloud along with the page content. It should also be noted that this text is also used to support Search Engine Optimisation.
A description of the image should be inserted in the Alt Text box provided when the image is uploaded. When writing the Alt Text for all non-decorative images, the following should be noted:
- Avoid the use of “image of” or “photo of”.
- Keep the text short (less than 240 characters) and descriptive. A good description is concise but accurately describes what’s in the image to understand its context.
- It’s not necessary to add text in the caption.
- When describing a chart, diagram, or complex illustration, consider using both Alt Text and additional descriptive text.
- The same image used in two or more places may require different alternative text, as the page context may have changed. Hence it should be noted that any changes made to the Alt Text when editing a page are not reflected in any other occurrence of the same image, including the media library.
Content creators should consult the u3a readability guidelines for more information. The W3C has a range of resources including a decision tree.


