Introduction #
WordPress has several features that allow a block or set of blocks to be reused. This reduces the web manager’s workload and ensures consistency over related pages, such as Group summary pages. This guide provides information on:
Patterns (Reusable blocks) #
WordPress block patterns are a collection of pre-made design elements that you can use to create custom content layouts faster. SiteWorks has both several predefined WordPress patterns and the ability of the user to create additional patterns,
Predefined patterns #
Using the option supplied on the Block Inserter toolbar, content creators have access to a large number of predefined patterns. This provides an easy way to configure a page, with predefined content including several Call to Action and Banner options. As with any predefined layout, care needs to be taken to ensure the overall message is not lost in conflicting styles.
It is recommended that those relating to posts, footers and headers are not used, as these will conflict with the u3a theme.
User-defined patterns #
Across any website, a paragraph of text may be used several times, for example describing the arrangements of the scheduled monthly meeting. While the information could be re-entered, WordPress has a reusable block or synced pattern feature. The block can be a paragraph of text, list, image or group; the process is identical.
With the block selected, select the option icon (A) and then Create pattern/reusable Block (B).

A further box will appear into which the name of the block is entered, in addition, you are given the option to Synch the pattern:
- If Synced is selected, a change in one instance of the block will change all the other instances.
- If Synced is not selected, each block is considered independent – hence allowing minor changes to the block to be made (i.e. meeting location or times) without impacting the other instances of the block.
On saving the block’s Toolbar is updated with the new name.
To use the block in a new page, etc, select the Patter icon on the block browser toolbar (A), and select the required pattern (B). The pattern will then appear at the defined location in the page being edited, C.

If the synchronised pattern is no longer required at a specific location, for example, extensive editing is required, selecting the Detach patterns icon, D, will convert the pattern back to plain blocks.
Managing a block pattern #
It is possible to manage the patterns created by the user from the Site Editor.
- From the Dashboard, select Appearance ⇒ Editor.
- From the Design page, select Patterns.
- Under My Patterns are shown those patterns, the user created. Alongside each pattern, selecting the three vertical dots allows:
- Renaming
- Duplication
- Exporting
- Deletion.
Group #
WordPress has a Group Block function that allows the content creator to group several blocks together and customise them as required, including setting custom background colours or images, spacing, etc. Groups can be formed from existing blocks or created using the Group block.
Combining Separate Blocks #
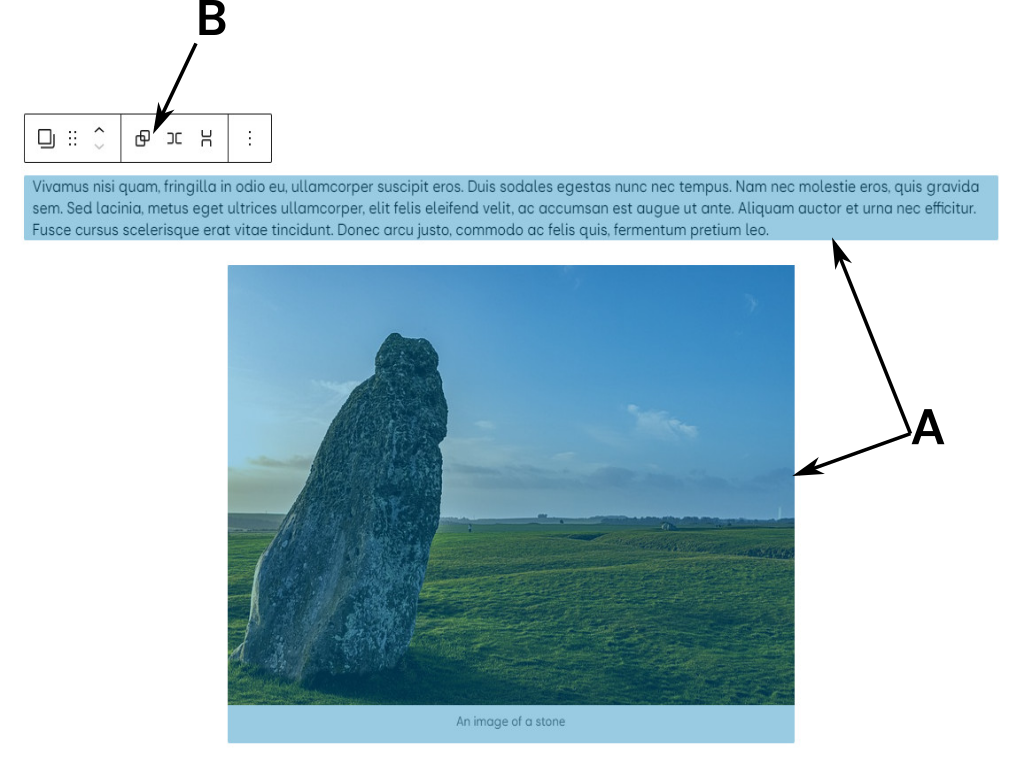
Two or more blocks can be combined into a group. The required blocks should be selected using shift + click, following which they have a blue overlay A, then select the Group icon, B. The selected blocks are placed in a single container.

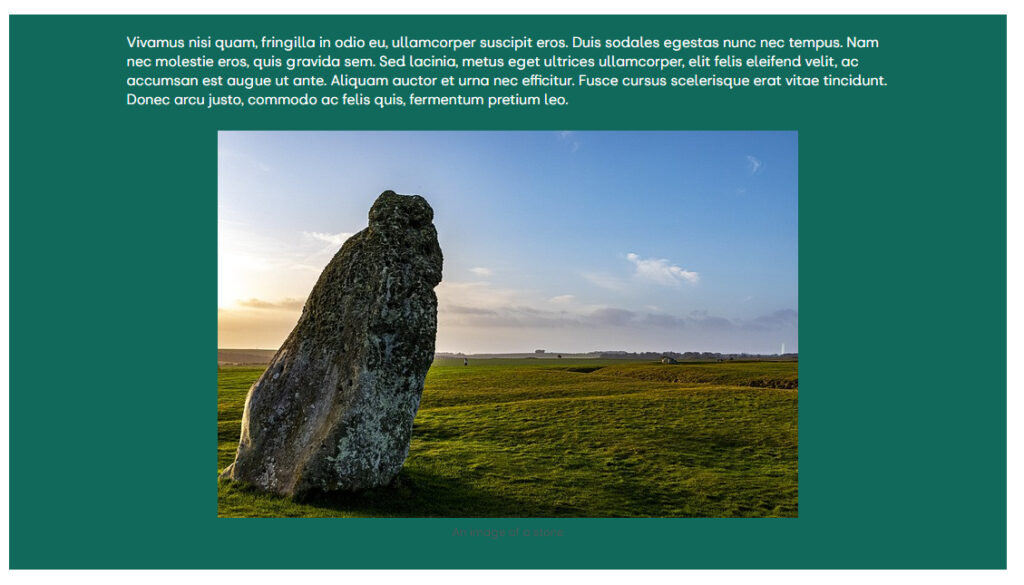
Once the group has been created, the block can be formatted in the usual manner, in the example below, the background has been set to the u3a Forest Green and the text to white. It should be noted that the picture caption is not considered text in this instance.

In addition to a coloured background, an image can be used, select Background in the Group Styles sidebar, and upload the images from an external source of the media library. Care must be taken to ensure that any text becomes unreadable due to the contrast between areas of the image and the text colour, as shown below:

Naming or renaming groups #
To aid the management of groups it is recommended that they be named as follows:
- On creation:
- Select Advanced on the Group’s setting sidebar, and enter the required name into the BLOCK NAME box.
- Renaming:
- Select Advanced on the Group’s setting sidebar, and change the entry in the BLOCK NAME box.
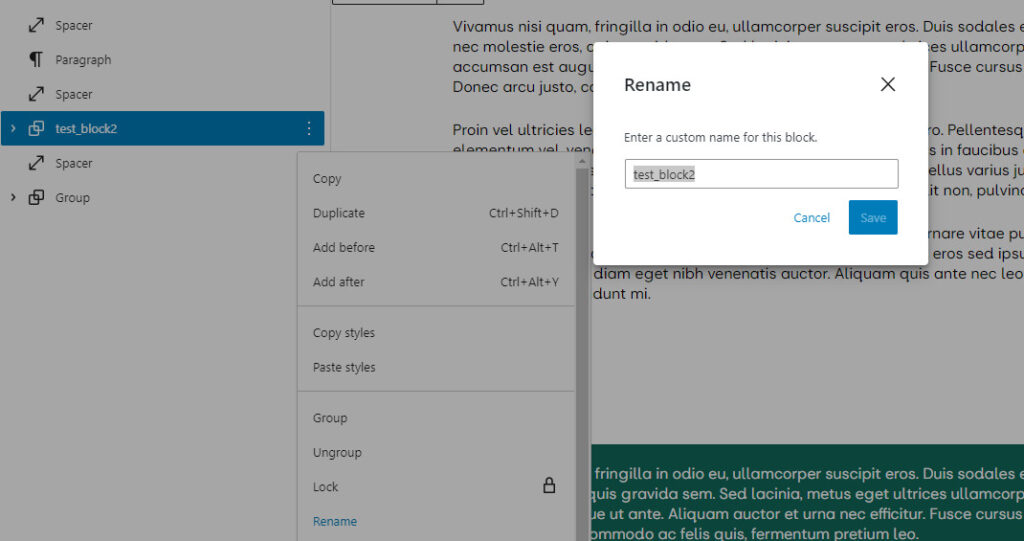
- From the document’s list view, select the option icon (three vertical dots) ⇒ Rename. A rename box appears, enter the new name and save. The new name is reflected in the list view of the page:

Using the Group Block. #
Using the Group Block, it is possible to construct the following content like this:

To construct the above select Group from the block editor, and then layout options, which are from left to right, Group within a container, Stack or Row, the latter two are subsets of the group feature, and it is possible to switch between them with ease from the settings toolbar.

In this example, the container option was selected, and the block editor was used to enter content, which is shown in the layout tab. Finally a background colour and a border were added to the first column.
Row and Stacks #
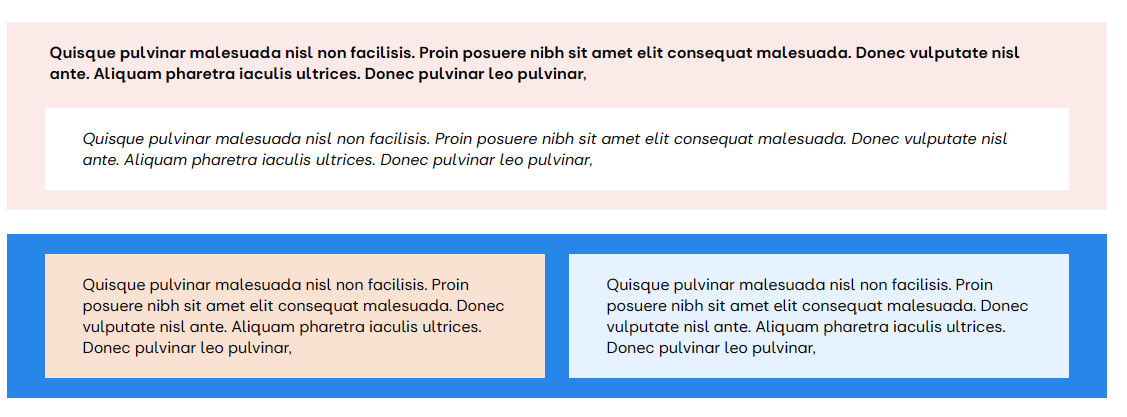
The Row block and the Stack block option allow the page author to insert multiple blocks across a row (or vertically with the Stack block) which are spaced evenly. The Row block allows the addition of various elements on the same line identical to columns. An example of a stack and row structure is shown below:

In the Stack (top) example, the stack background is coloured, with one of the paragraph blocks left with a white background. In the Row (bottom) example, the backgrounds of all elements have been set to a different colour.


