
SiteWorks uses the WordPress Media Library; this guide discusses how to upload an image and, if required, perform limited editing. Uploading an image to a WordPress post or page is considered separately.
Media Library #
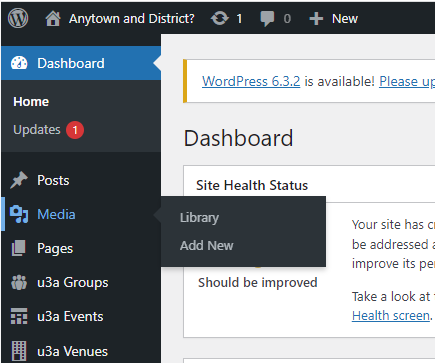
Two options are presented: select Media ⇒ Library to view all the media files currently uploaded, or Media ⇒ Add New to add additional media files. All Users can use the Media Library.
Uploading to the Library. #
To upload a media file to the library, from the Dashboard or Library, select Add Media File, then either:

ZIP and similar files cannot be uploaded to the library.
Once the upload process has been completed, the media file appears below the upload box:
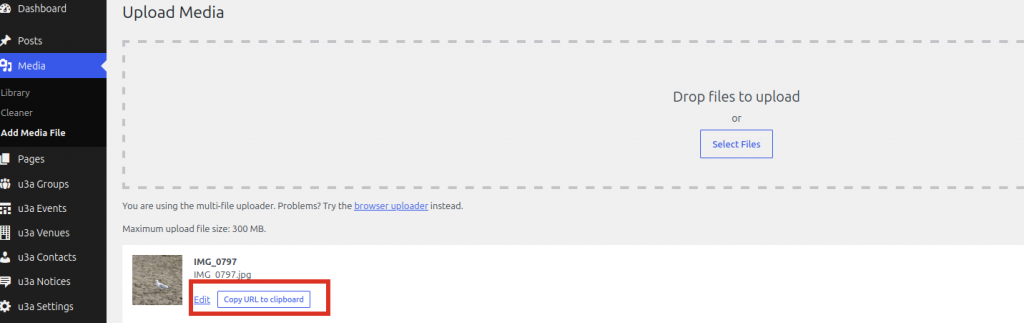
Once uploaded, a thumbnail of the image appears with two options: Copy URL to clipboard or Edit. At this stage, it is recommended that the content creator review the image and add a caption and alternative text.
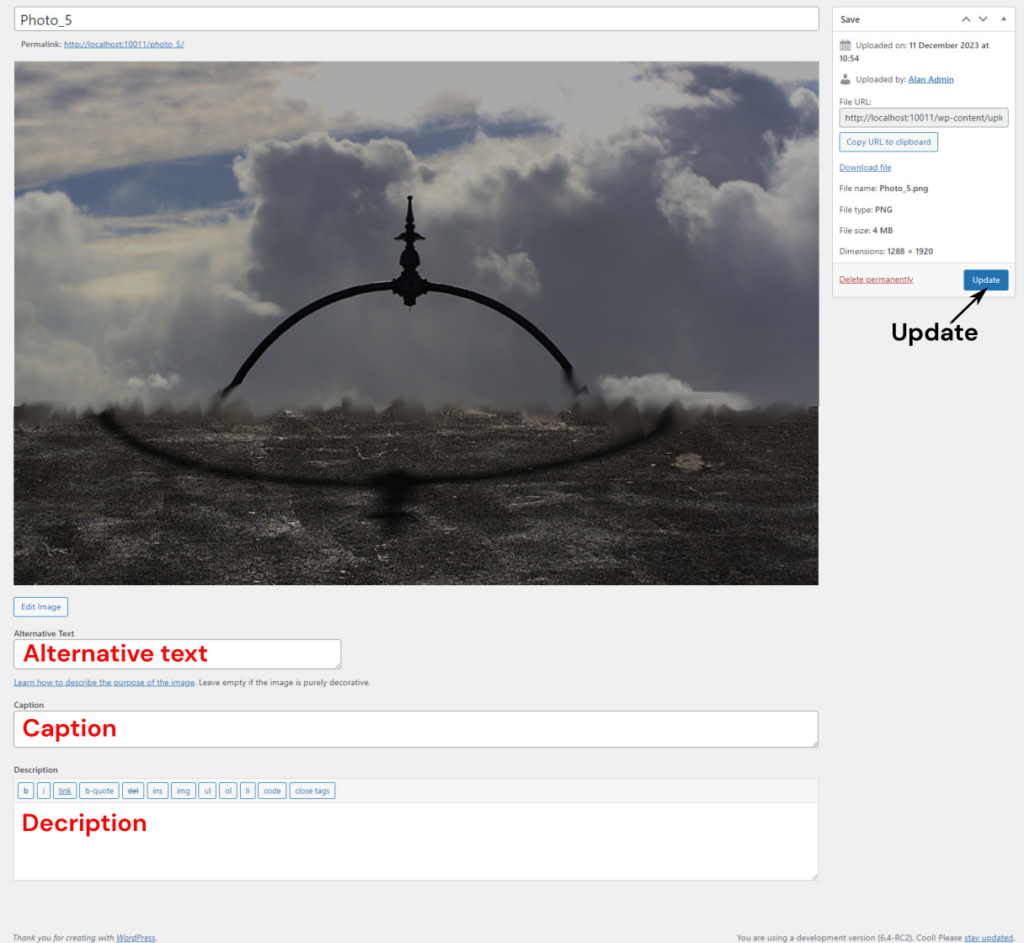
At the bottom of the screen (scrolling down as required), the content creator can enter:
- Alternative Text or Alt Text.
- The caption. This will be visible if the display option is selected in the Image or similar blocks. The caption should be checked, as some image editors add information such as “Edited in XYZ” as a caption.
- Description, including the photographer’s name, the date of uploading, etc., and any other additional information.
On completion, the information should be saved by selecting Update.
Viewing the Library #
On selecting Library, all the media files available are shown as a grid. As a site may have a hundred or more media files, a set of tools is available to help you navigate as required:
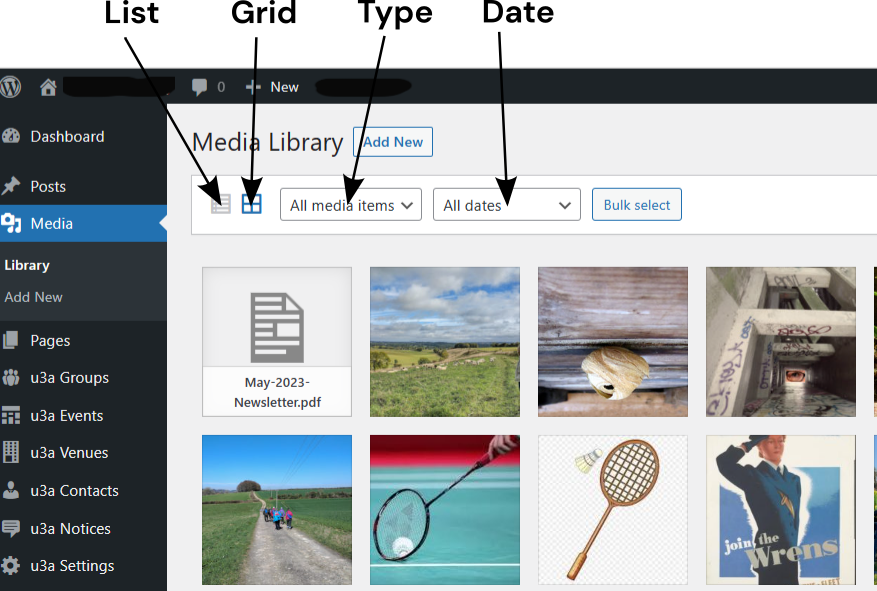
- Grid: The default grid layout shows all media available. Note that the images are all displayed as square thumbnails – this is for presentation only; the image has not been cropped. Depending on how Infinite Scrolling is set up within a user profile, two options are available:
- If Infinite Scrolling is set, all the images appear, allowing the user to scroll through them continuously.
- If Infinite Scrolling is not set, only a subset ot the images are shown, then the user is required to load the next set.
- NOTE: if a media file manager plugin is used, the Infinite Scrolling option is inhibited.
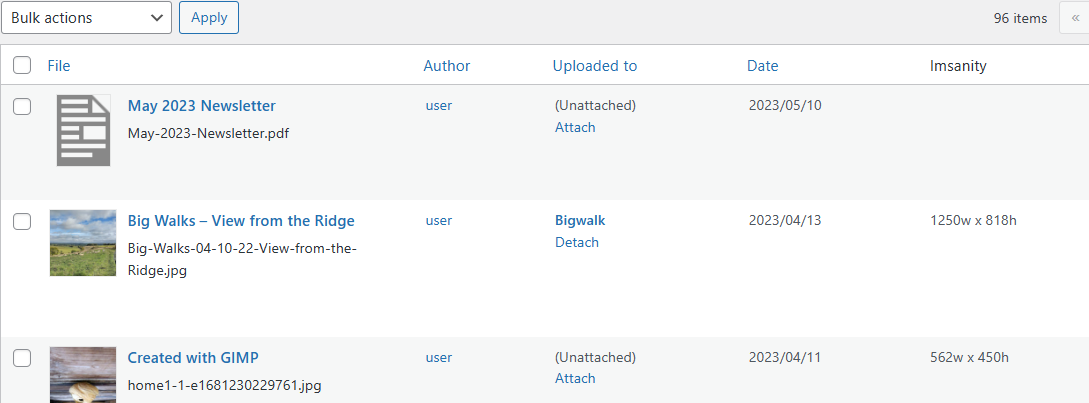
- List: all media is presented in a list format, with additional information including who uploaded it and when. If the media is an image file, its size following processing by Imsanity is also shown
- Two filter options are available:
- By Type: this allows sorting by type (i.e., images or documents, etc.) or if they have been uploaded by the current user (Mine)
- By Date: filter media by the upload date.
The files in the library are displayed as a grid of square thumbnails or icons, depending on the media type. Selecting the thumbnail will bring up the details of the media item, as shown below:
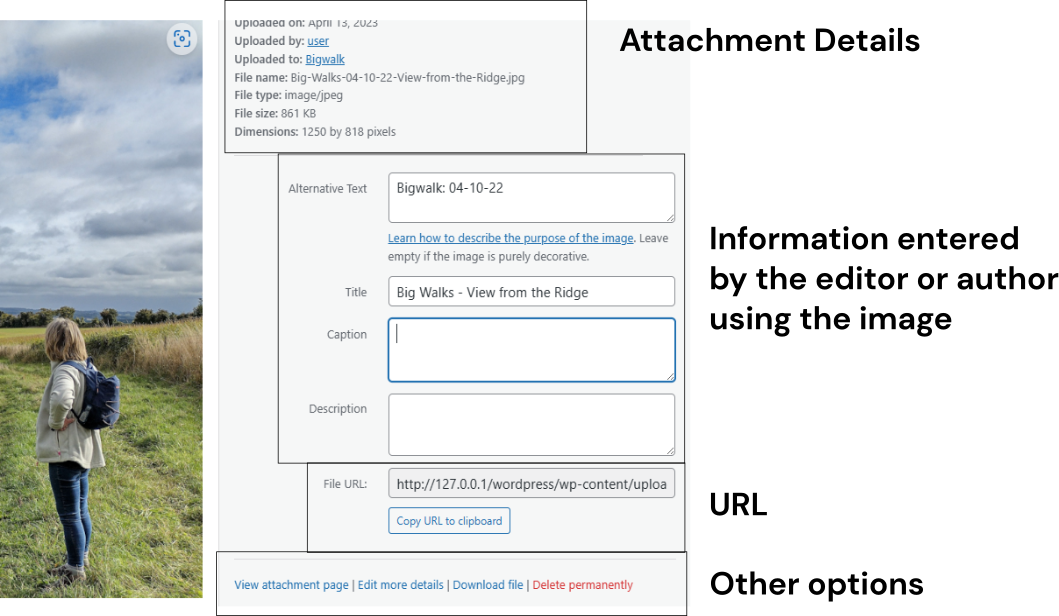
In addition, four pieces of information are provided regarding the attachment:
- The details of the media file, including size, upload date, etc.
- Information, including title, caption, description and alternative text, can also be entered by the editor or author of the page when the media file is used. If need be, copyright information can be added to either the caption or description box.
- The URL of the media can be saved to the clipboard.
- Other options:
- View the page where the media is used.
- Edit the alternative text, caption or description.
- Download the media file
- Delete the media file.
If the List view is selected, a list view of the library contents with a summary of the key information is provided, including the image size in the Imsanity column:
Searching the Library. #
The user can search for media by three routes:
- The search bar at the top right-hand side of the page searches across all text associated with media, including its URL.
- The media filter selects a document type, e.g., images, documents, or audio.
- In the upload date filter, the default condition is All Dates. Selecting the month will show those media files that were uploaded during that month.
Editing Image #
To undertake editing, select Edit when the thumbnail is selected. This will allow the metadata to be edited. To edit the image, select Edit Image directly below the image to access the editor:
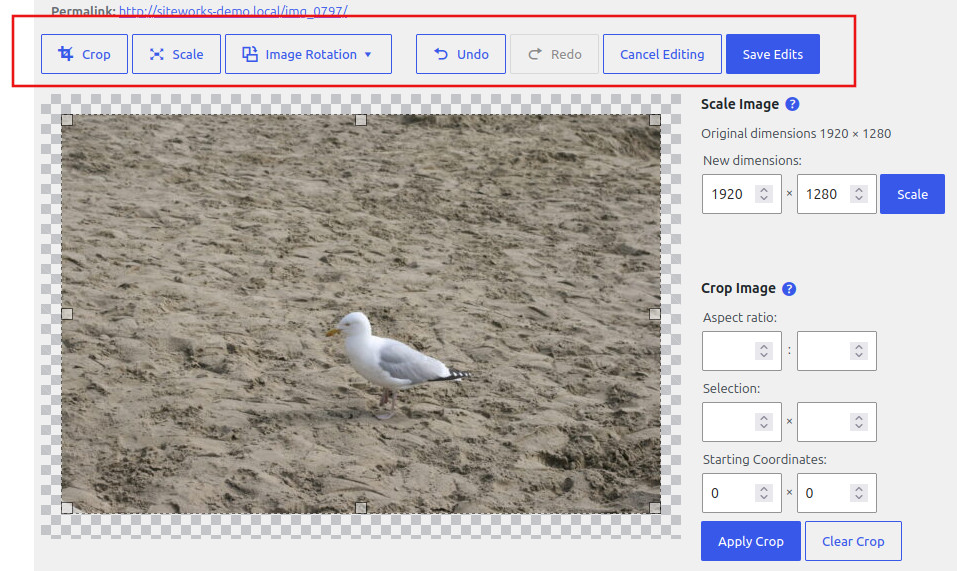
Several editing options are available, including image cropping, scaling and rotation. Once editing has been completed, the edited image must be saved.
Note Regarding Media Files Links #
It is important to note the following regarding the links associated with a media item:
- If a media item is deleted, the associated links are not deleted but need to be removed manually.
- If a file name is changed in the metadata, the URL generated by WordPress during the upload process will not change.
Resizing Images #
As discussed here, the size of an image needs to be carefully controlled to ensure that it is displayed correctly and that the SiteWorks memory requirements are minimised. This section shows how to use the bulk image resizing facility and the facility to resize individual images in the Media Library. No image should exceed 1920 pixels in any direction.
The recommended approach is to use a photo editor before uploading to adjust the image’s resolution.
The Siteworks distribution included the Imsanity plugin, which compresses an oversized file when uploaded via the Media Library. However, it is possible to upload oversized images by using a site transfer or similar plugins. The following processes can be used within SiteWorks to adjust an image’s resolution.
Resizing an individual image #
In the Media Library, select the List View, where the oversized images are identified. To resize the image, select the resize image button (A).

Once resizing has been completed, Imsanity will confirm the revised image size.
Resizing several images #
If the Media Library contains several oversized images, Imsanity can handle multiple images.
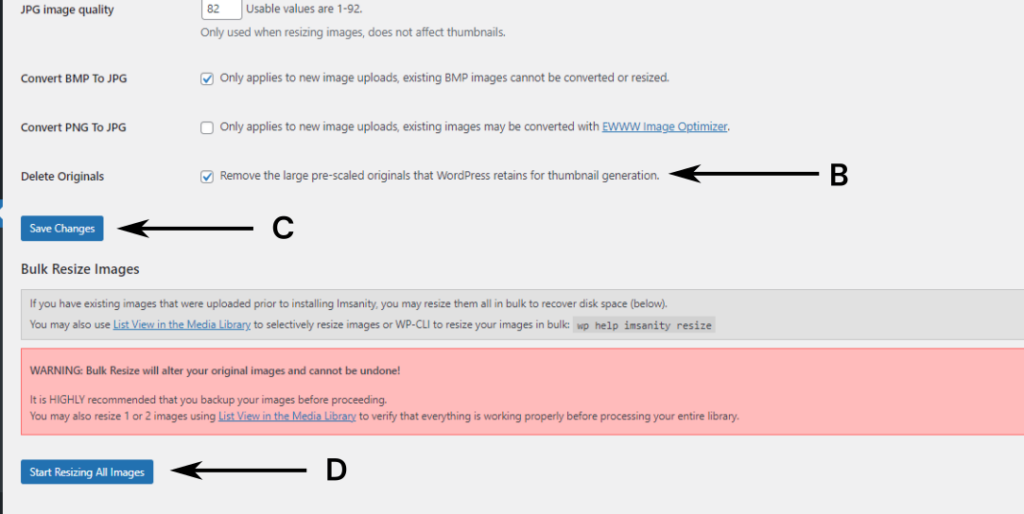
- Open the Imsanity Settings panel, Dashboard ⇒ Settings ⇒ Imsanity.
- Check that the option to Delete Originals is selected (B). If not, tick the box and select Save the Changes (C) before continuing.
- Select Start Resizing All Images (D), and then confirm.
- Imsanity will list all the images in the Media Library, either confirming that the resizing process was OK, or if the image was Skipped (i.e. no resizing was required)
When resizing has finished, the last line will show “Resizing Complete”. Do not close the web page until the process has completed.


