Introduction #
This user guide discusses creating and editing a group’s web page. The website administrator or editor should have entered all the required information before any groups are created.
In the context of a u3a and SiteWorks, Group, refers to an interest group that a u3a has set up to allow members to learn about topics of interest or participate in a joint activity.
It should be noted that within WordPress/SiteWorks, the main group page is a WordPress page, and a Group Page, containing information regarding one specific group is technically a WordPress Post.
Adding a New Group #
Only a user with administrator or editor rights can create a new group. After creation, the maintenance of a group webpage can be delegated to a user with the role of Author, as discussed here.
To add a new group, three pieces of information are mandatory:
- Group’s Name
- Status, i.e., Active, Active but looking for new members, etc.
- Category – the broad grouping into which the group fits, e.g. Arts, Music, Science and Technology, etc.
Select u3a Groups ⇒ Add New Group from the Dashboard, and a new group screen will appear. When the group information elements are not visible as they have been minimised. The small arrowhead (▼) to the extreme right of Group Information at the bottom of the screen should be selected. In certain browsers, the adjacent ∧ ∨ icons will move the group’s information into and out of the sidebar.
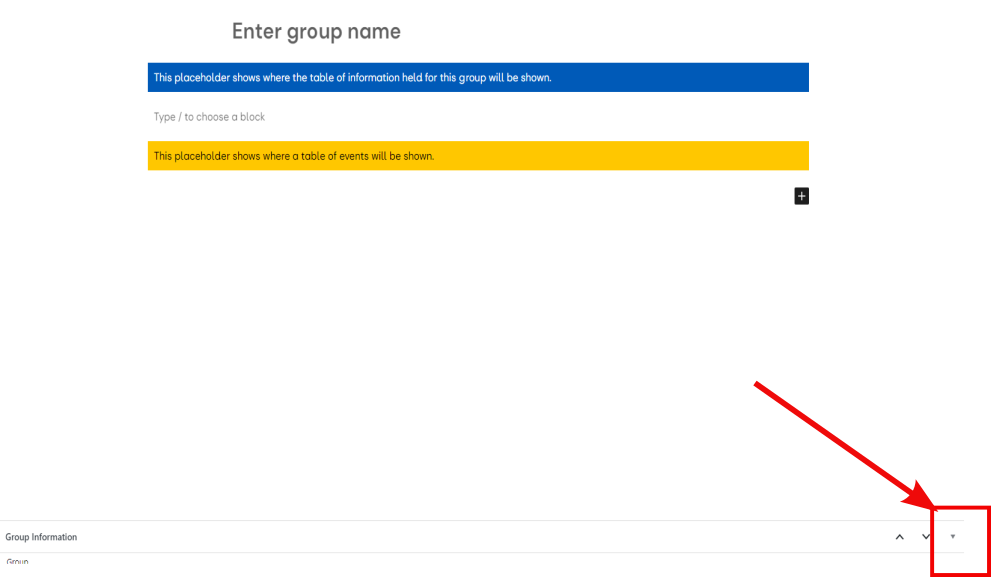
Location of the icon to expand the Group Information, when the information is not displayed. The icons to the left will move the group information into and out of the sidebar in certain browsers.
Once the full form is displayed, information can be added:
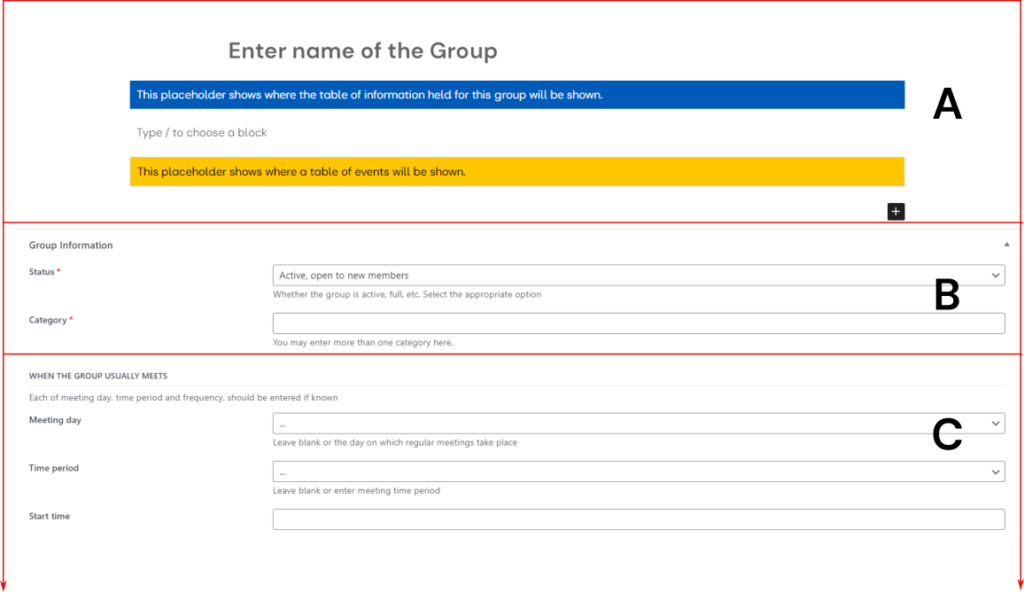
The screen is divided into three sections, in section A enter the material that will appear on the individual group page using the block editor. The Group Name must be entered to clear the error message. In addition, two widgets are provided to provide consistent placement and structure of relevant information on group pages across an individual u3a site.
- Group information will be displayed where the blue block is placed. This information is drawn from the group information stored in SiteWorks, which is populated as the group is created.
- Group events are shown where the orange block is located. For an event to be shown, it must be in the Events list and be allocated to the group.
In section B, the group category and the status are entered, this information is mandatory.
It is possible to add more than one group category using the pulldown menu, as shown below:

If a category is to be deleted, click the x to the left of the category to be deleted.
The remainder of the screen (C) allows the webpage author to enter a wide range of information. If the information is not provided, nothing is displayed. The information that can be entered includes:
- When the Group Meets.: Pulldown menus are provided for the days of the week, start time, end times, and frequency. If this does not fit the pre-defined meeting pattern, a free text box is provided, e.g. The group meets on the first Monday of the month between September and May.
- Venue: The meeting venue can be added, using a pull-down list of the Venues entered into the system.
- Contact Details, select the group contact(s), this information needs to be first entered into the u3a Contacts page. An email specific to that group, if available, can be added. It should be noted that the group is responsible for supplying these details to the website administrator.
- Cost information: Entered as a line of text, if required
Once the Group data has been edited and saved, using, Publish, it will be displayed as a group page, for example:
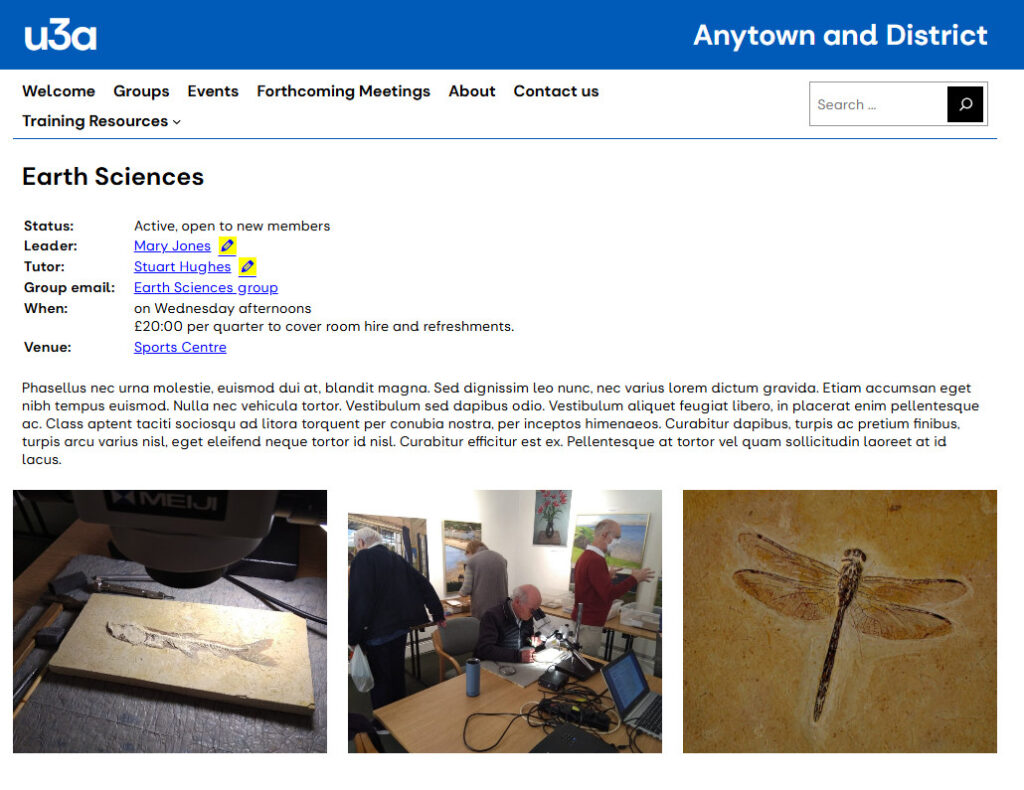
If a site visitor selects the Leader, Tutor or Group email, the u3a contact form will be used. It is recommended that the Hide email addresses option is selected in the u3a group settings. When setting the emails. it should be noted that the group is not automatically identified in any email received by the contact, except for the group email. This email is entered directly by the page’s content creator and not from a pull-down list.
When the group page is being viewed by a user who has logged in and has contact editing rights, an edit contact icon appears next to the contact, this takes the editor directly to the contact’s page.
It is possible to define a group’s status, e.g. Active, Closed etc, however, it should be noted that the text, in the current implementation, between the Groups page and the individual group page differs slightly due to the length of available space for text. The table below shows the current wording:
| Set Status | Displayed text: Groups Page | Displayed Text: Individual Group Page† |
|---|---|---|
| Active, Open to new members | Active | Active, Open to new members |
| Active, not currently accepting new members | Full | Active, not currently accepting new members |
| Active, full but can join waiting list | Waiting List | Active, full but can join waiting list |
| Temporarily inactive | Dormant | Temporarily inactive |
| No longer meeting | Closed | No longer meeting |
Reviewing and Removing Groups #
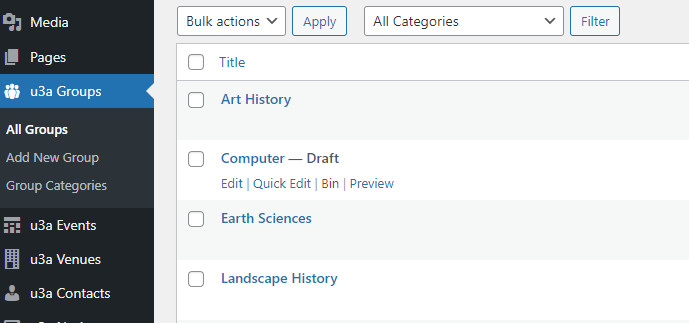
To review all groups, select u3a Groups ⇒ All Groups from the Dashboard, this shows the complete list of all groups within the u3a. It is possible to filter the list by the Group Categories, using the pull-down menu (All Categories in the default setting) and then Filter directly above the group list, as shown below:
Temporarily hiding a Group #
If a group is not running, but the group leader does not wish for the status to read Temporarily Inactive (Dormant) or No longer meeting (Closed), it is possible to hide the group by saving the group’s page as a Draft.
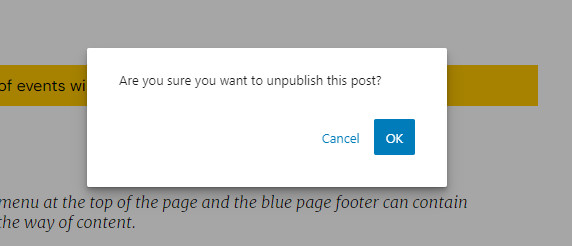
To set a page to Draft, select Switch to Draft from the Administrative Toolbar, once you have finished editing the page. WordPress will ask you, Are you sure you want to unpublish this post, select OK, as required. Do not select Publish after saving it as a draft.
When selecting the list of all groups, – Draft, will be appended to the group name.
To re-publish a group from a draft, select Publish. WordPress will recheck, and request confirmation.
It should also be noted that the visibility of a Group Page, can be restricted using the option in the right-hand sidebar, under visibility. When a page is set to Private, it will still be visible to administrators and editors, which could lead to confusion.
Deleting a Group #
To delete a Group, select Bin. A Group can be restored from the Bin, but not if it has been permanently deleted. If a Group has been deleted, any associated events will not be deleted and will remain visible. It is the responsibility of the administrator to delete any unwanted events,
Main Group Page: Listing Groups #
It is normal for information regarding groups to be accessed by the Group option from the main Navigation Menu. A draft webpage is provided in the SiteWorks distributions
To edit this page, select Pages ⇒ All Pages from the Dashboard, then Groups from the list of pages available for editing.
The page can be edited, to provide an overview of a u3a’s group activities. It is possible to list groups by one of two approaches:
- The provided u3a Group List Widget.
- A configured shortcode.
- A query loop.
Group List Widget #
The u3a group list widget block must be included in the page design when a list of groups is required. This approach is recommended for u3a content creators who do not wish to create and maintain custom query loops or shortcodes. The block, u3a group list, generates a list of all published groups, which can displayed as filtered or sorted, depending on the option set in the Groups tab of u3a settings, together with several configuration options. An example of a group page, as seen in the editing mode is shown below:

The blue widget bar will expand to provide group information in two formats, the group list display option is set to sorted or filtered, giving the following following results
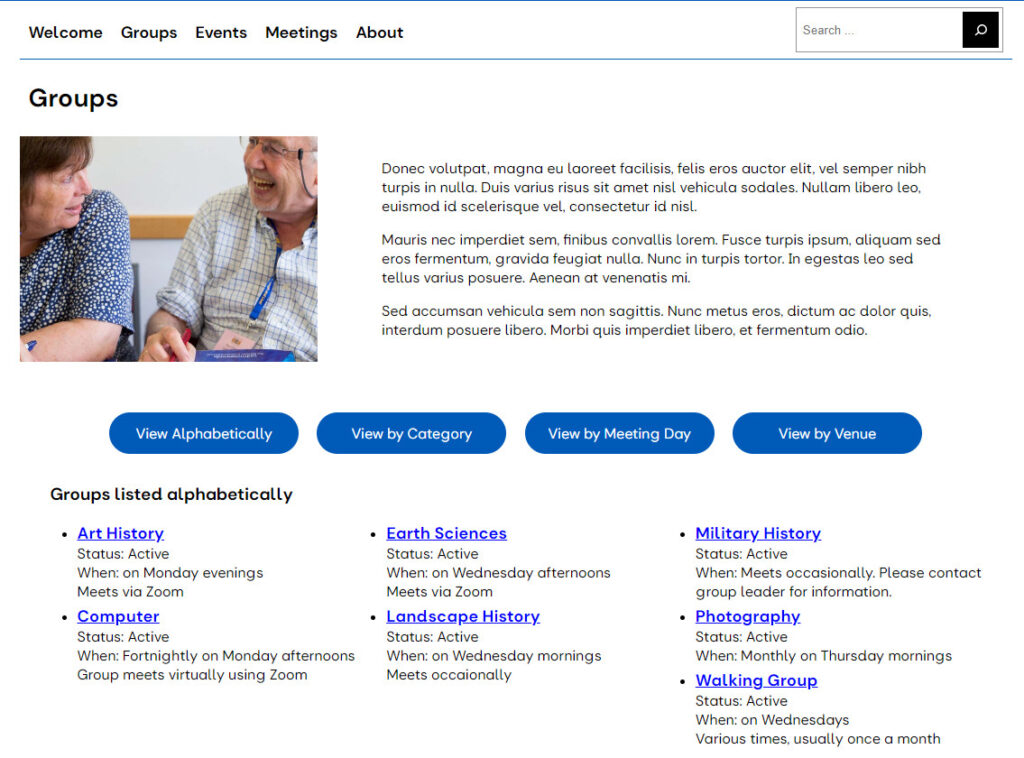
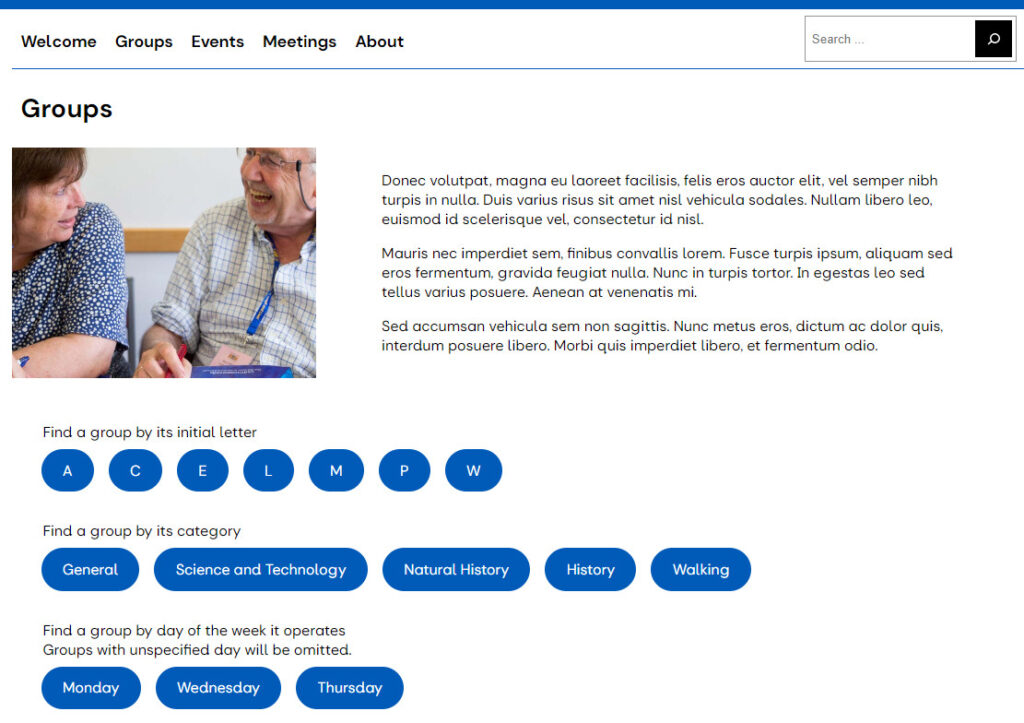
It is possible to configure the default display of the u3a Group List Widget, by selecting the Widget, the options are presented in the right-hand toolbar:
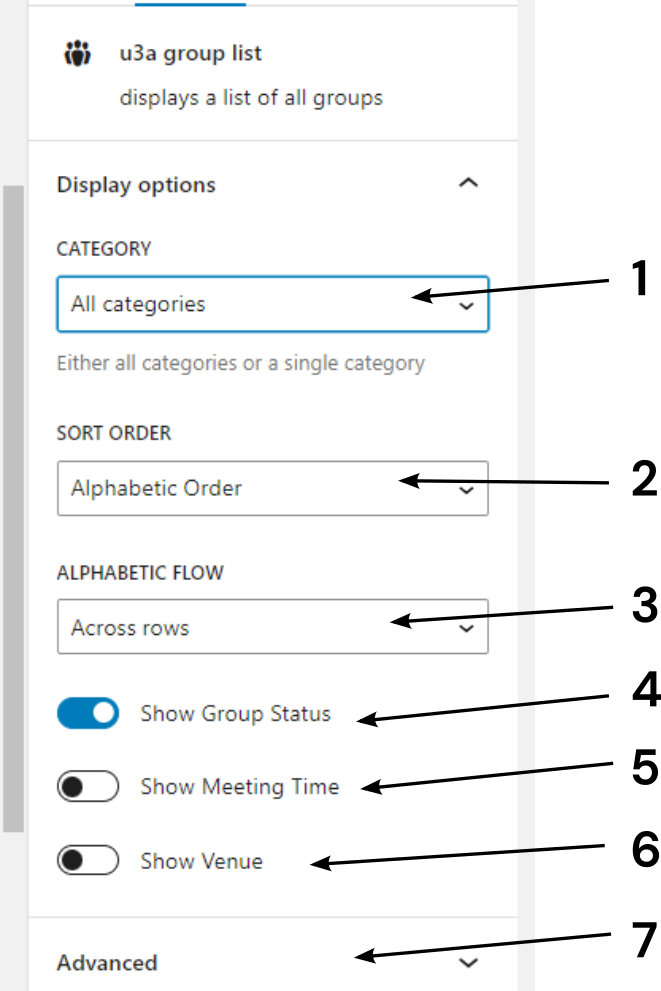
The following options are available:
- All published groups can be displayed or the list can be restricted to a single category
- Options for sorting include alphabet, category, date, and venue.
- The displayed list of groups can be arranged alphabetically either down the column or across rows.
- The Group status information is optional
- The Group Meeting time is optional
- The Group Venue display is optional.
- Advanced options include the provision of an anchor.
Examples of the listing options available include:

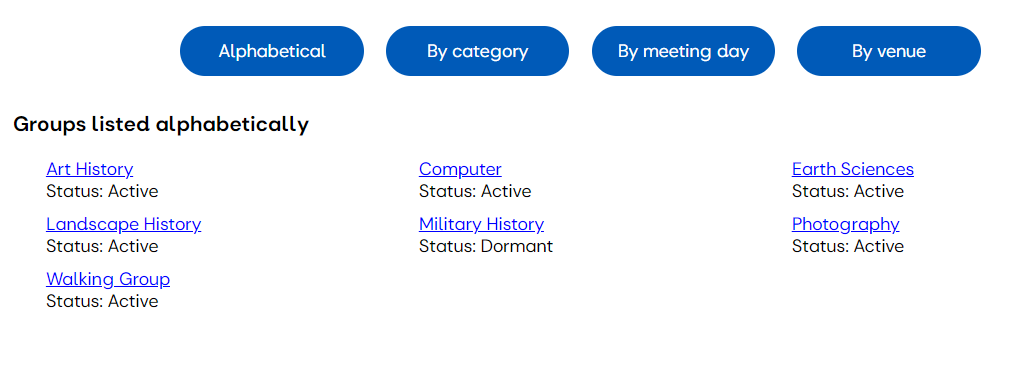
Groups listed by Down columns, with all other information suppressed
Groups listed by Across rows, with the group status, added
Using the Shortcode #
While the use of the widget is a convenient approach to the development of a page that lists all groups, however, it is not possible to customise the displayed list, this can be overcome by the use of a configurable shortcode, which has the general form [u3agrouptlist option], where the option is the parameter that provides the customisation and is in the form Command Word = “Parameter”. For this feature to work, the Group List Display option has to be set to ‘Sorted’, see u3a Settings.
The available options given below can be used to configure the group list:
| Function | Command Word | Parameter |
|---|---|---|
| List groups in a specific category | group_cat | all, group category |
| Set the default sorting criteria | sort | alpha, cat, day, venue |
| To display group status | group_status | y, n |
| Display the day the group meets | when | y, n |
| Display the venue | venue | y, n |
The shortcode option can contain one or more command words with their parameters. If the following two-column layout is created:
[u3agrouplist]
[u3agrouplist sort= “cat” when = “‘n”]
The following is displayed:
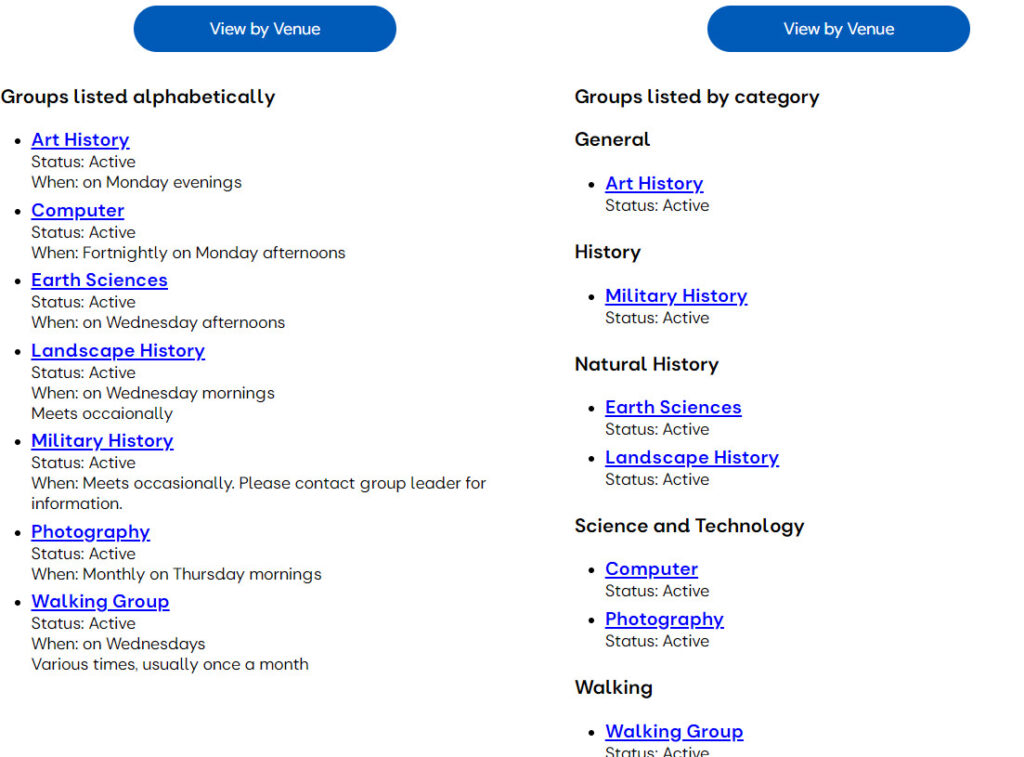
The list on the left is the default display, and the list to the right is sorted by category (sort = “cat”), with the meeting date turned off (when = “n”). It should be noted that the list view still included the four sort options, however, the pre-defined status and when options are still enforced.
Using a Query Loop #
A query loop can be configured to list groups as shown below. However, the view is fixed, and not selectable.

This can be achieved by:
- Add a Query Loop Block. Choose the required pattern, in this case, Grid has been selected.
- Set to Query Loop options to:
- Ensure the Inherit query from template option is not selected.
- Set post type to Group.
- Order by A Z.
- Delete the Excerpt and Date blocks from the Post Template.
- Make the Title a link if required.
- Select a Title block and adjust the text size and colour, then the background colour or image, margins and padding.
Adding a List of Groups to All Group Pages #
If a u3a wishes to radd a list of all groups to each individual group page, the easiest approach is to create a new page template, as follows.
Select Appearance ⇒ Editor from the dashboard to reach the Design page, then select Template. On the Templates page, select + to the right of Templates to Add New Template (A). From the available options select Single item: Group (B):
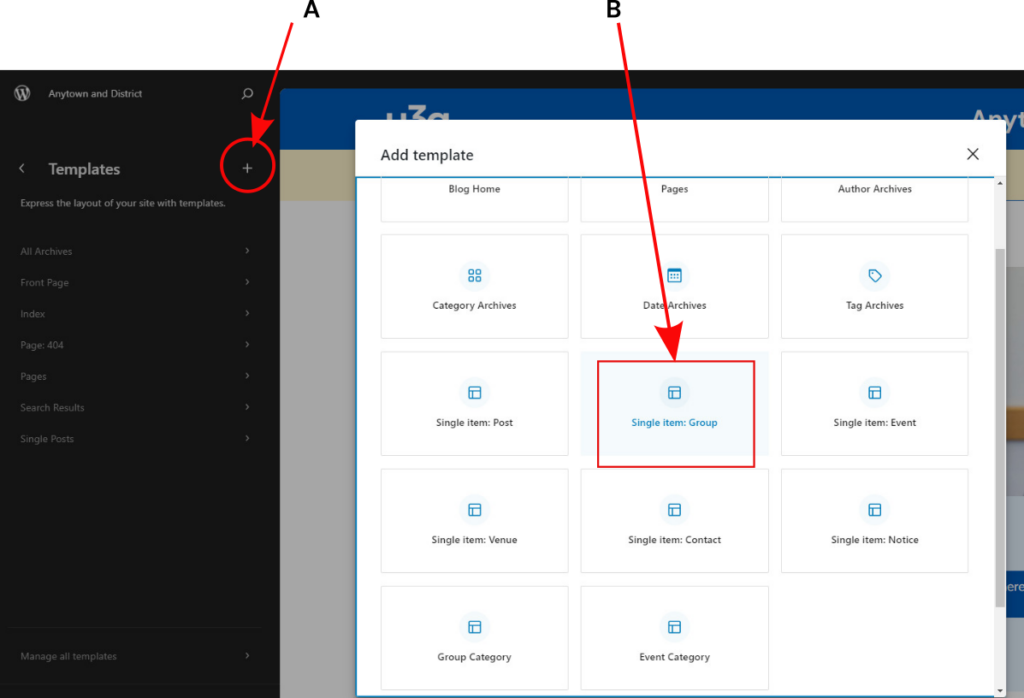
From the next set of options – select All Groups, then select the predefined pattern to be edited, using the u3a group list block
The page can be edited using the block editor, the following points should be noted:
- To aid page design, the content should be placed in a single column, with the Inner Block use Content Width set, content set to 1100 px, for the optimum display.
- The addition of a spacer and suitable padding will improve the appearance.
The edited template is shown in the image below, on completion, the new template must be saved.
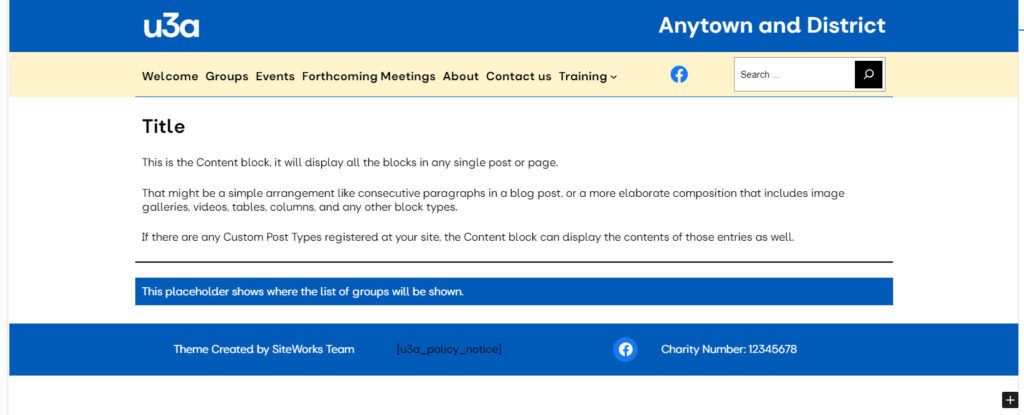
If an individual group page is opened, the group list will appear at the bottom of the page:
