Introduction #
The Administrator can make significant changes to the site’s appearance and functionality by editing the Navigation Menu in the header and the information contained within the Footer. This information is visible on all web pages across the website. In WordPress, the header and footer, together with related features, are termed templates.
The Navigation Menu is the set of links that sit across the top of the web page and provide the site visitor with a route to navigate to different pages within the site. This guide explains how to edit the Navigation Menu and Footer to provide the layout required.
It should be noted that while a user with the role of an Editor can create pages, they require the Administrator to add any page to the main menu structure. However, an Editor can create a link-based menu within a page, as discussed here. This process can, if not carefully controlled, lead to the possibility of orphan pages within the website. It is recommended that the u3a committee and the Website Administrator agree on a policy regarding this matter during the planning of the website.
Selecting the Header or Footer for editing #
In WordPress, the Front Page template takes precedence over all other templates. Hence, if the Front Page header and footer are edited, the changes will reflect across all the posts and pages in the site, unless a page or post is assigned to another template.
Access to the header or footer for editing can be achieved by one of two approaches: as a Pattern or from the Page Template.
As a pattern #
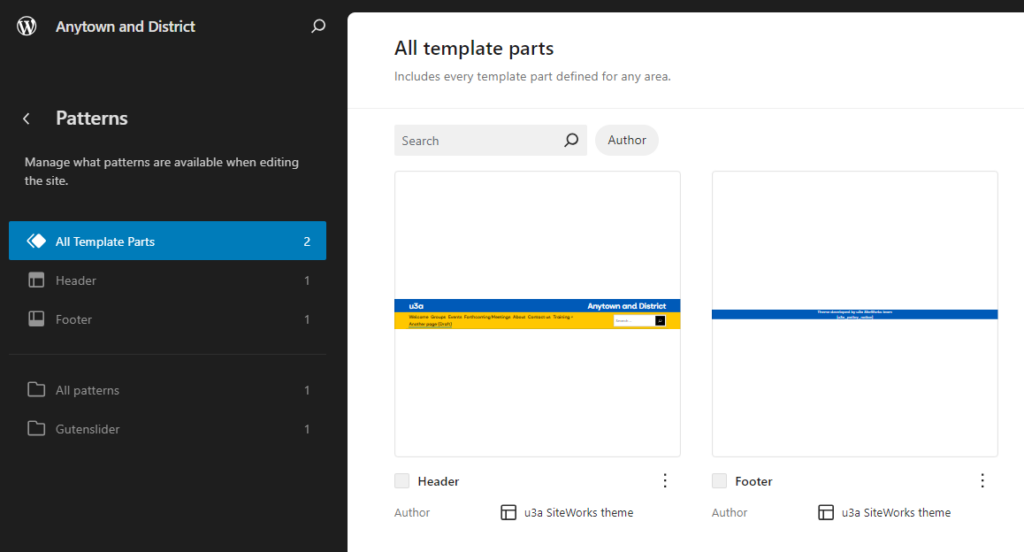
Within the SiteWorks Theme, the Header and Footer are configured as individual patterns. They can be accessed by:
- From the Dashboard, select Appearance ⇒ Editor.
- From the Design page, select Patterns.
- Ensure All templates Parts is selected in the left-hand sidebar as shown be;ow, then select the Header or Footer image as required. Moving the cursor over the template, it will change to a “hand”.
From Page Templates #
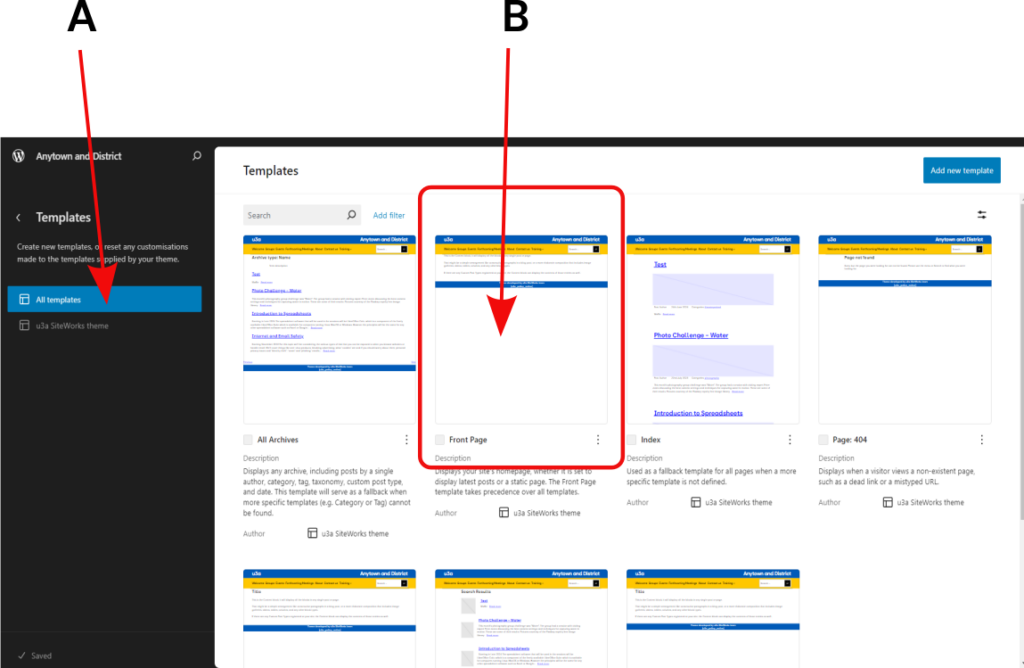
- From the Dashboard, select Appearance ⇒ Editor.
- From the Design page, select Templates ⇒ All Templates (A). This displays the templates used in the site as image panels.
- Now select the Front Page image (B) as shown below. As you move the cursor over the template, it will change to a “hand”. Then select.
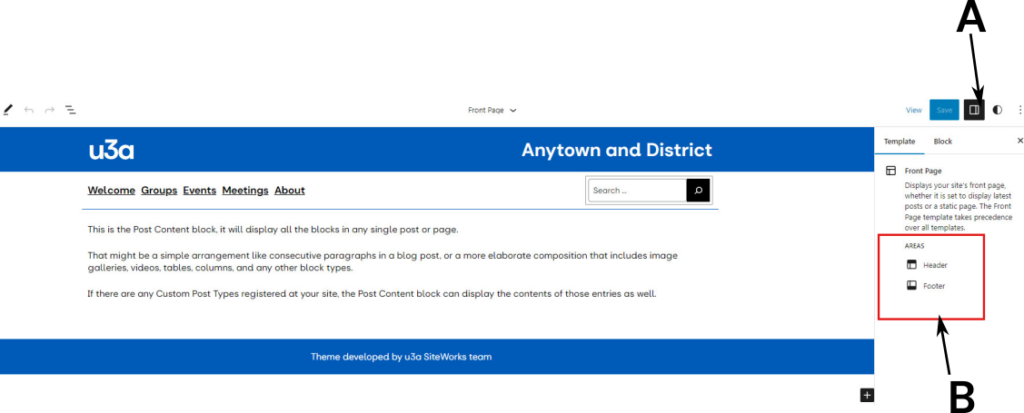
To permit editing, the settings sidebar must be visible, if not, select using the icon, A, then from B select Header or Footer as required.
Editing the Header #
Title Bar #
The title bar contains the u3a logo and the name of the u3a. The name of the u3a is set via u3a Settings.
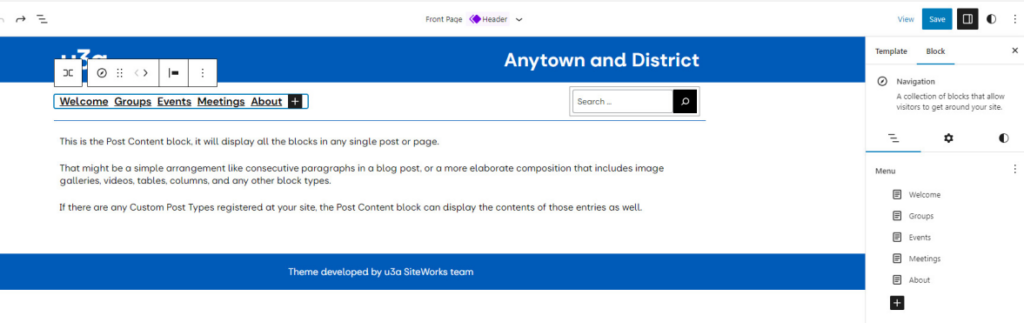
Navigation Menu #
On accessing the header, adding a menu or a sub-menu item is possible. To minimise errors it is recommended that particular attention is taken to the breadcrumbs or the Document overview (to select use Shift+Alt+O). To edit, select Navigation from the Document Overview, noting that the breadcrumb trail will show Template > Header > Group > Row > Navigation. After selection, the navigation bar is highlighted:
Navigation Bar Background Colour #
In the default configuration, the colour of the Navigation Menu is set to White. This can be changed as follows:
- Select Group from the Breadcrumb trail or Document Overview.
- Select the required background colour from the Group Style sidebar. In selecting the colour, ensure that the contrast between the text and background is maximised.
- Save the modified header
Editing a current item #
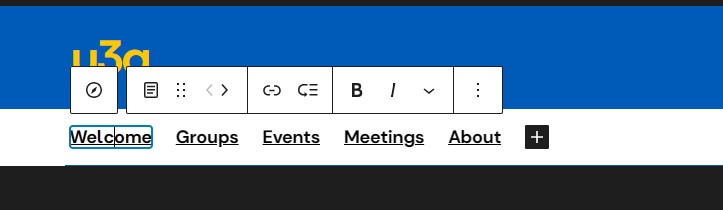
Select a navigation element and edit the text as required. The block Toolbar permits the link information to be changed. In addition, the < and > icons allow the position of the menu item to be adjusted.
Adding a menu item #
To add an item, select the Navigation bar and then + at the right-hand side, or in the settings sidebar, the required information regarding the new menu item can be added:
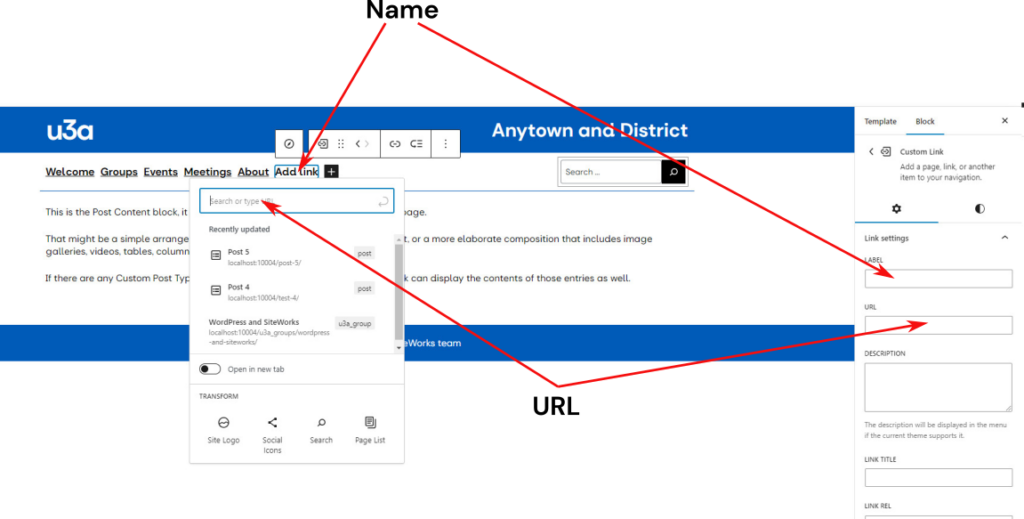
- The name of the menu item can be added by:
- The page title is directly added to the Navigation bar if you find the page using search.
- Typing over Add Link as required
- Entering the name into the Label box
- The URL can be:
- Entered directly into the search box, or searched for by entering the page’s name
- Directly copied into the URL box in the sidebar.
- From an external site, e.g. the u3a national office.
- An option allows a new page, as a draft, to be added to the site if required. Scroll to the bottom of the available links, where an option to create a new draft page is provided. Note: the page will not appear in the menu until it has been populated and published.
Once entered, the new item can be positioned, using the < > icons as required. Note a menu instance referring to a draft page cannot be positioned until the page is published.
To remove a menu item, select the item on the Navigation Bar and from the option box, select the three vertical dots, then Remove. Ensure you have selected the item to be deleted, not the whole navigation bar.
On completion, ensure the changes are saved. WordPress will confirm that the site has been updated.
Adding a Sub-Menu Item #
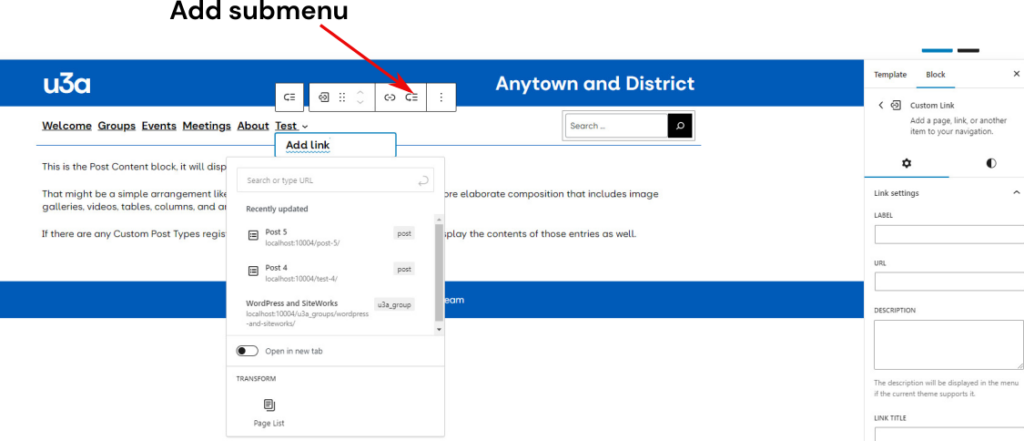
WordPress allows the creation of sub-menu items. For example, you could go from Information to Meetings to Annual General Meeting. Currently, only two levels of sub-menus are permitted. To add a sub-menu item:
Select the menu item in the Navigation bar, i.e. the parent of the sub-menu item. From the Toolbar, select the Add sub-menu icon, and the Add Link option appears, into which the required information is added.
On completion, ensure the changes are saved. WordPress will confirm that the site has been updated.
Deleting a Menu Item. #
Select the item to be deleted, then from the Block Toolbox, select the three vertical dots option to the extreme right, scroll down to the last option, remove the item name, and select the item name as the name of the element is deleted.
On completion, ensure the changes are saved. WordPress will confirm that the site has been updated.
Adding a Social Media Icon #
To place a Social Media icon on the header, the following process should be followed
- Select the Header.
- Move the cursor between the Navigation Bar and Search Box, and the Block Inserter Icon will appear.
- Select and locate the required icon for the Social Icon block and configure, as discussed here.
Editing the Footer #
The page Footer normally contains the following information:
- The u3a’s Charity number (for those u3as who are registered charities).
- A copyright statement for both the theme and content.
- A link to the u3a’s Website Terms and Conditions page. While an individual u3a can follow its own policy, it is strongly recommended that a u3a uses the provided text that has been approved by the Trust’s legal team.
- One or more social media icons if not already added to the header.
Link to Website Terms and Conditions. #
A link to the Website Terms and Conditions can be provided in the footer by the Shortcode: [u3a_policy_notice]. It should be noted that the link will only appear if the page is present and has been published.
When viewing a page, if the “Website Terms of Use” link does not appear, check that a page titled Website Terms and Conditions is in the list of pages and is published (i.e. not draft).
Layout Options for the Footer #
Select Footer, in an identical manner to Header, to gain access to the Footer block, which can then be edited as required using the Block Editor. The Footer can either be constructed using a Columns block or several blocks within a Row block. While the Columns approach will automatically give the correct spacing, the use of a Row will require adjustment to the individual block to give the correct layout.
On completion, ensure the changes are saved. WordPress will confirm that the site has been updated.
Hence, in the edit view, a design based on a three-column approach will appear as:

The footer seen by a site visitor will be:

If the design is based on the use of a Row block, a social media block can be added, if required, to give:

Linking to Images in the Header or Footer. #
It is possible to place an image (for example, the u3a logo) into the header and footer if required.
Linking from text is NOT recommended, as a text link is by default formatted as underlined blue, which becomes almost invisible against the default header.
The logo used should be in white against a transparent background (i.e. PNG format as opposed to JPEG), to conform with the SiteWorks standards and the u3a colour palette. The u3a logo file can be obtained from the Brand Centre.


